Showing posts with label Halloween. Show all posts

Halloween treats

For my kids to take treats to school, I kind of like to do something more than just handing them a piece of candy.  Don't get me wrong, I do not hand them something bigger or larger than candy, but I just like to spruce up the candy so it doesn't look so generic or boring. 


This year for my little guy's preschool class, we decided to give "Tootsie Pops" since those are his favorite.  But just a sucker would be kind of blah.  So we dressed it up like a ghost. 


This probably seems lame to some of you. But back in the day when I would go trick-or-treating, it was so fun to get these suckers that looked like ghosts.  All you need is tissue, ribbon, suckers and a marker. 


Wrap the sucker in the tissue


and tie a ribbon around the bottom of the sucker. 


Use the marker to make two little dots for the eyes, and there you have it.  A little something more than just an ordinary old sucker. 


"Witch" legs are those


There's something that makes me smile at the sight of striped stockings and witches boots at Halloween time.  But how I could I incorporate that into my Halloween decorating? And then I was inspired by these pictures I keep seeing of witches legs hanging out from under a house as if the house had fallen on her. Why couldn't a witch get caught in the fireplace while trying to get into a person's house for the holiday.  Lucky for me I have a fireplace (an electric one mind you) that would be the perfect location for such a holiday delight. 


I took some old striped socks and stuffed them with cotton batting.  I then found some cheap fabric and totally made the shoe pattern as I went, and then sewed the stuffed shoes to the socks.  I added a bit of tulle to the top of the legs to resemble the bottom of my witch's skirt. 


Make sure to sew a strip of fabric to the top of the socks so you have something to hang them by, and then with a quick addition of magnet strips, she was ready to hang to the inside of my fireplace. 


And there you have it.  A sneaky witch, caught in the act of breaking and entering.


Happy Halloween!!!


Ghoulish Portraits

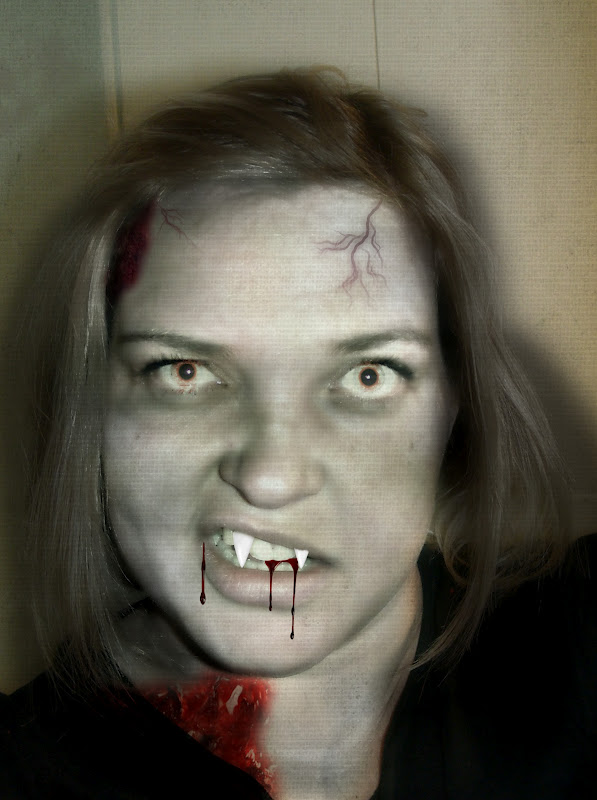
I am in love with this website called picmonkey.com  Here, you can edit and transform some of your favorite photos to create even better images.  Well, as if that's not enough, they have this creepy and fantastic Halloween app that allows you to upload your very own photos and make yourselves as ghoulish and scary as possible.  There is an app to make them cute too, but who wants to be cute for Halloween.

Check us out


I actually am getting these printed out so we can hang them for Halloween....


Pretty Scary Looking Group!!


Creepy skulls


I bought this skull at Michael's Crafts.  It's made of plaster of paris and only cost me $12.99, but actually less when I used the 40% off coupon.  What a steal right.  But skulls like this can't just be painted white and left at that.  Skulls are never that nice. Especially spooky Halloween skulls.  So something else needed to be done to add drama to this piece. 


The best solution.....antiquing or color washing it.  Now, you can pick up antiquing paint at the craft store as well, or the color wash I used I had purchased at the art store not long ago.  


This process is so easy.....anyone can do it.  There is no skill needed.  First thing you need to do is paint the skull white with just a generic acrylic paint purchased at the craft store for $0.69.

Then, pour the color wash on top of the skull (you will want to work in small areas at a time) and use your paint brush to make sure it gets in all of the cracks.  Immediately after that.....DO NOT LET IT DRY.....you want take a damp cloth....


and wipe off the excess paint, leaving paint only in the cracks and dents of the skull.


Around the teeth, you want to make sure to use a lot of color wash so it looks extra gross.  
Here's the good news, if you mess up and don't get the wash off quick enough or leave more than you want on the skull, just paint over it with the white paint and try it again.  

I then painted the entire inside of the skull black just to finish it off.  


And there you have it.  A skull that looks authentic, creepy and perfect for Halloween. 


"Boo" to you

I am dying with excitement that Halloween is coming up so quickly.  My house is already decorated and ready to go.  But, one thing I have learned over the years, is that no matter how many decorations you have, there's always room for one more thing.  For example, I needed something to sit on top of my microwave so when you looked towards my kitchen you could see the decorations didn't just stop at the family room.  


I found some letters from the craft store and modge podged Halloween paper onto them.  You could decorate them however you want.  Then, while perusing through the aisles of the local Dolllar Tree, found these perfect bat cutouts.  Already that saves me a ton of work of having to cut things out. 


I drilled a few small holes in the letters, added a bit of stiff wire, and then glued those little bats on.  
It is a rare occasion that I actually use the cupboard above the microwave, but when I do it is annoying to have to keep taking each letter down and placing it back up.  So my solution......screw those letters together. 


Now they have a little more character being overlapped and all.  And you can twist them any way you want. 


Now Isn't that crafty!!


Scary Spider

It's been far too long since I have posted on this blog....but as you may relate, summer is quite crazy.  And, my little girl has started school so early this year, that I am still trying to figure out what month it really is, and what has happened to this thing called time.  But, I have been busy creating and  crafting away and have so much to catch up with and share with you.

I am starting on Halloween early this year.  I am in desperate need of cool, fall weather and by focusing on Halloween in August, I am hoping my pleas for an early fall are heard.  I love super cheap and super easy crafts that add fun and excitement to my holiday decor.  This one couldn't have been any easier or any cheaper.


I was at the local thrift store and found these cute metal spiders.  What are people thinking giving away such treasures as metal spiders?  Well, whatever they may or may not be thinking, I am grateful for my fortunate finds. You too could be so lucky as to find durable metal spiders at your local thrift store or even craft store, or perhaps just the plastic spider rings at your local dollar tree will work just fine too.


I then glued the tiniest magnet I could find at Michael's Craft Store to the bottom side of the spider ......


and then attached them to my front door.  Most exterior doors are metal, so this is easily done on most doors.  


How fun is this?!?!  I am loving it and am so ready to delve into more easy Halloween crafts.  This one was just to get you all excited. 

Yikes....pumpkins with fangs

I love a jack-o-lantern with a bit of a bite, and am always looking for a way to decorate a pumpkin without using the same standard cutouts everyone has, every year.  So, how about this........a pumpkin with fangs.


So quick, so easy, so FUN!!!


Vampire Tools and Materials


Small white pumpkin. Those are sometimes hard to find, so you can get an orange pumpkin and use white spray paint and put just a light coat of white to it to give it a "ghoulish glow."

Miniature saw

Plastic vampire teeth 
(For a big bite, choose a small pumpkin so the plastic vampire teeth seem huge)


Small red map tacks


Vampire Pumpkin How-To


1.Cut a hole in the pumpkin to resemble a mouth.  One large enough to fit teeth into.

2.Wedge teeth into hole.

3.For eyes, pin map tacks onto pumpkin. 

And believe it or not.....that's it.

LOVE IT!!!


An easy to make Mummy

It wasn't too long ago that we finished our basement and have moved into it full force.  It's nicely decorated and suits our needs fabulously....until it comes to the holidays. I find that I am in need of more decorations to the addition of square footage.  So, I really do have to get to work on creating something new. 

I have such a fascination for mummies and find that at Halloween, we decorate with them far too little.  I knew I wanted to make some, but it needed to be an easier project as I am in the middle of yet another room remodel.  This project couldn't have been easier.  

I took a random size of a 2x4 board, covered it in modge podge and wrapped cheesecloth all around it.  You can buy cheese cloth almost anywhere. I got mine at the ever famous WALMART.


I then glued some googly eyes on the and let them dry.  That's it.  I wasn't kidding when I told you it was simple.  Took all of about 15 minutes to make 3. 


And if you want to make them a little more creepy, use a little ink, or brown shoe polish on the rough edges of the cheesecloth to give it the "old" look.  


Gosh, sometimes I can get pretty crafty!!

Frame it up!


A few "googly" eyes that are always available at the Dollar Store, a cheap wooden frame and a cute little "eek" saying or any other of your choice, concocted together are the perfect recipe for a fun Halloween Frame.  Who wouldn't smile at this?

Party Favors

If you have been following my blog at all, you should have figured out by now that I LOVE a party.  A good party with all sorts of treats, decor and favors.  My husband calls me Michael Scott (ya know...the guy from the office) because I will find any excuse to party.

So Halloween provides the perfect opportunity to through a shindig to rival all others.  I have come up with a super funny party favor that I love so much I feel like I can't keep them to myself.  


A coin purse I picked up at the thrift store ($0.10) and teeth from the Dollar Tree. (3 to a pack)
Use a little hot glue and you have the perfect gag gift.

Pretty sure a gift like this will have your guest laughing at loud and coming back for more!!!

Best Halloween Party Ideas


I have collected some ideas from Halloween's past that may be kind of fun for your holidays this year too.  Some of these I have done myself, and some of these are the creative genius' on the World Wide Web.  No matter where they are from, they are fun to make.........


A pumpkin cut in half, cleaned out and used as an ice bucket. Pretty crafty, eh?


White powdered doughnuts with red food coloring for the veins and a chocolate chip for the pupil.  The drink is just punch.  It's the outside that makes it awesome.  Use a little food coloring to dye Karo syrup and dip the glass in the syrup and let it run down the side.  Use a gummy worm to add extra EEEWWWW to the beverage.


This looks totally gross, but I am loving it.  Here's the recipe.  I am for sure going to try this at my party.

Halloween Meathead Recipe (Easy) Ingredients: 1 full-sized plastic human skull, 1.5 lbs. thin sliced deli meat, your choice, Cream cheese, BBQ sauce, or cranberry sauce, 2 hard boiled egg yolks, round mini-mozzarella, pieces, or cocktail onions, 2 slices of pimento-stuffed green olive. Instructions: 1. Buy a plastic skull. Wash the skull with soap and water and allow to dry. 2. Spread a "base" over the skull. BBQ sauce and jellied cranberry sauce give the skull a bloody, gory look as your guests lift away the lunch meat. Cream cheese is not as fun, but probably tastes better with most meats. This is entirely your choice. 3. Evenly distribute your lunch meat over the prepared skull, leaving openings at the eyes and mouth. Smallish pieces of meat work better than larger ones, as they're easier to manipulate and form. You may need to use toothpicks to get some of the meat to stay in place. 4. For eyes, place one hard boiled egg yolk or small mozzarella cheese ball in each eye socket. Top with a slice of pimento-stuffed green olive. 6. Cover with plastic wrap and refrigerate until ready to eat.


What fun to carve a pumpkin like this.  The teeth are actually marshmallows stuck in with toothpicks.  Here's a tip for your pumpkin carving.  When you are all done, spray the inside and raw edges of the pumpkin with WD40.  It will preserve them and make them last longer without such a dramatic withering. 


Fun cookies.  Striped fudge cookies with a little orange frosting holding a kiss on top.  This is always a big hit with the kids.


I just got me a set of these at Pottery Barn.  I am shaking in anticipation to serve up a dish with these.


Hot dog mummy's  anyone?

Just a few ideas to help you get your party on!!

Halloween for Baby


I was trying to come up with a funny gift to give my friend for her newest little baby boy's baby shower.  Since the baby is due around Halloween, I thought it would be funny to give him some way to dress up without going overboard. While surfing the Internet, I found something both funny and very frightening.  These pacifiers that make these poor babies look like...well I don't even know what to say about them other than YIKES.  Too harsh to get that for my friend, but it got me thinking. I could make something similar, yet less deforming.
How about mustache pacifiers!


Check out how cute these turned out.  The mustaches are made out of black felt fabric and attached with double sided sticky tape, or even a dab of hot glue.  These will be perfect for a little Halloween trickery.  
At least it's better than these:


Now baby can share in the Halloween festivities too!!
Pretty crafty, eh!


Cupcakes anyone?


Who could resist a cute cupcake with a skeletal frame comprised of a marshmallow skull and yogurt minis pretzel ribs supported by a lollipop stick? Whip up a batch of these bony characters with your favorite cake mix and canned frosting.

Use your favorite cake mix to create your cupcake.  Just follow the directions on the box. Cool and then frost

  • For the Decoration, here's what you will need:
  • 18 marshmallows
  • 4-in. lollipop sticks
  • Black food color
  • Decorating pen
  • Black writing gel
  • 72 yogurt-covered mini-pretzels


  1. To decorate: Slightly flatten marshmallows with palm of your hand. Insert a lollipop stick into each marshmallow. With the black decorating pen, draw the skeleton mouth along the bottom of each marshmallow. Draw 2 nostrils above the middle of the mouth, as shown. Make the eyes with dabs of the black writing gel.
  2. For each skeleton, carefully thread the stick end of the marshmallow head through the small hole of a pretzel, slowly twisting the pretzel from side to side as you push it up toward the head, stopping about 1⁄2 in. below the head. Secure the pretzel in position with a dab of frosting. Add 2 more pretzels, lining them up, to resemble the rib cage, securing with dabs of frosting. Stick the skeleton into the top of a cupcake. To make the arms, carefully cut a pretzel in half with a serrated knife and attach to the top pretzel using a dab of frosting to secure it on.  
And there you have it.  Isn't is "spook"tacular!


A Witch's Broom

For Halloween, my neighborhood reminds me of the kind you typically see on TV where there are just kids roaming all over the streets in search of tasty sugary treats and perhaps a few tricks along the way.  So, it's important to me that I try to enhance their holiday moods with a little holiday decor to greet them at my door. However, I am not into all of the spooky, creepy things that deter the youngsters from ringing the doorbell.  
So whatever crafty thing I can come up with that will welcome haunts and ghouls, I am all over it.  

I have a cute little sign that says "park your broom at the door." I felt like I needed to park a broom at the door so people kind of got the idea.  And what witch rides a nice "store bought" looking broom?  No, we needed a more authentic looking piece, and then the wheels in my crafty little brain went to work.  


I have this old costume suitcase full of the remains of Halloweens past.  You never know when you might need to use an old costume again, right?  Well, my years of saving have paid off before, and this year was no exception.  I dug out an old grass skirt my little girl got from her aunt and uncle when they took a trip to Hawaii. It was too small for her to wear now, but I thought hmmmm......with a little paint and hot glue, that would work perfect as the bristles to my witch broom.
So, I busted out the yellow spray paint and painted it so that some green would still show.  And with my hot glue gun, I wrapped the skirt around the end of a large tree branch I too spray painted, and here's the result.  


The perfect broom for any witch.
Don't you agree?


So after a nice little windstorm we had not too long ago, I went into my backyard and found twigs from trees that could not withstand the gusts.  It's not like they were hurricane force winds or anything, so perhaps I should pay more attention to my brittle trees.  But for now, I was thrilled to see the twigs laying there.  Afterall, everything, trash or treasure, gets used in my world.  So with a little black spray paint and a trip to the dollar tree (who already has Halloween candy out) I was able to create another "haunting" decorative craft.


I think it's pretty crafty!