Showing posts with label Valentines day. Show all posts

Have a SUPER Valentines Day!

I love it when my kids get to exchange Valentines with their friends at school and get to decorate boxes and envelopes.  It's like crafting nirvana for me.  I am not one who goes to the store and buys the pre-made Valentines cards and just adds a piece of candy. Oh no! If it doesn't require some forethought and time.....it's just not worth making.  Okay, so I'm crazy, I know.  But it is fun to share things with others that may not be so common.  This year for some reason both of my kids are really into the superhero thing.  So I thought it would be fitting to make some superhero valentines to share with their super valentine friends. 
With the use of a sucker.....tootsie pops or blow pops....


 and this template that needs to be printed and cut out...

You can put it all together on your sucker and have a SUPER superhero valentine to give to your kid's friends!


Happy V-DAY everyone!!


Sealed With A Kiss!

Due to my never ending grace and my unfailing balance and coordination, I have been forced to slow down doing the things I enjoy because of this hideous reminder of what happens when you are showing off in unsafe conditions.  I was showing off my pretty stunning goulashes that I had just recently purchased for $5 from a local thrift store, and doing so while shoveling my icy driveway.  I'm sure you can guess what happened next.  So, although I am blessed with many talents, ice skating and cat-like reflexes are not on that list.

But, I can't let a cast get in the way of my crafting.  So while I am still pressing forward...........it's just moving a bit slower these days,  perhaps these next few postings of valentine's flare can be saved for next year, unless you are like me and celebrate the holiday the whole month long.


  I have found this fantastic store in Salt Lake called the Wood Connection where you can buy all sorts of fun holiday decor that will help you get your "craft" on. If you don't live in the Salt Lake area, you can order from them and they will ship to you. The craft store is full of unfinished wood projects at super affordable prices.  Although I personally enjoy cutting my own wood, I know there are many out there that don't have the equipment to do so. So for a few minutes in the car and a moment of recovery from such visual stimulation, you too can have cute holiday decor, still original to you because you still have to finish it,  just with a little less hassle.

Since using any sort of blade or saw would be an accident waiting to happen while in my current condition, I got in my car and headed to the store and found some cute things I wanted to share with you. 

The store has pre-made kits of certain projects, or random letters, vinyl cutouts and other various items so you can create your own.  I choose to do SWAK or Sealed with a kiss for those who don't understand "texting" language.  (My husband is still confused and is sure I just made it up.  I find the W being turned upside down to make an M all of the time.  I know it's him just trying to be funny.)


Anyway, I found some darling craft paper and decided to use that on the letters as opposed to painting them out.  Whatever you choose is perfectly fine.  So I traced the letters on the paper, cut them out and I did paint the sides and backs of the letters.  You can kind of tell I chose hot pink and turquoise blue to match my paper. I glued the paper on but chose not to modge podge over the top.  I just didn't want the shine.  

*And here's a fun tip for you for when you are using paper on wood.  Sometimes it can be hard to cut the paper to fit EXACTLY to the shape.  I tend to have hangover and once it's glued on, it's hard to trim off.  Well put down those scissors and grab a piece of sandpaper and use it to sand off the edges.  It will nicely trim the paper to the shape of the wood and can also help get rid of any edges that might threaten to snag and tear up. 


There ya go.  Even with one hand, you don't have to give up on sprucing up the place for the holidays. Just make it a bit simpler for a while instead. 

XOXO!


The "Light" of my life

Valentines Day is quickly approaching and for most of us, finding that "Perfect" gift is next to impossible.  My husband does not enjoy candy, it would take a miraculous event to get a reservation at a restaurant, and the fact that we have two invasive children, well, ya know, kinda kills any romance you could attempt to create at home. 

So this year I decided to make my valentine a little something different.  A reminder of where he stands in my life. Now he can put it on his desk as a reminder of his role in our family. 


People, this was so easy to make, and I am sure that whoever you give it to will love it because it's creative, it's as inexpensive as it gets, and most important, because you made it. 

Here's the how to:

Take a light bulb.   Just your standard, ordinary old light bulb.  It doesn't matter if it's clear or white, just needs to be a light bulb.  At the bottom of the light bulb, below that black ring is a piece of flat metal.  With a pair of pliers and probably a garbage can underneath, you want to pry that piece of metal off.  The black ring holding it on is glass and it's okay if it breaks. 


Once the metal is removed, use your pliers to break apart the black ring and  pull out the filaments inside. 
*In case you are wondering, yes, I am wearing a cast on my left hand.  A cast that went all the way to my shoulder.  So hey, if I can do this one handed, surely you can do it with two hands.


When the filament and all the inside pieces are removed, the bulb (if it's white) will start shedding the powder that's on the inside of the bulb.  It's not harmful, so take it to the sink and wash that bulb on out. 


While the light bulb was drying after being rinsed out, I had to make my new filament to put inside.  I took a heavy gauge wire and with my pliers, fashioned it into the best heart I could possibly make.  And then because I have this crazy obsession with glitter, that's what I used to embellish it. You can paint the wire or leave it in it's original color.  Your call.


Because I was afraid that this was looking a little "girly", I decided to adhere this to an old weathered piece of wood to try and "man" it up.  I used a 1" drill bit to make a hole just barely deep enough to hold the light bulb in and not risk it tipping over and breaking.  I hot glued the sparkly filament on to the wood....


And then slid the light bulb over the top of it and hot glued the bulb to the wood.


If you're doing it right, it should look like this right now.


Now for the finishing touch, a little note
"Light of my Life" and with some little pins pinned to the wood.  


Now you have a unique and darling valentine to give your sweetheart this year.  And although small and simple, it's packed with tons of LOVE!!


Yummy Valentine Accessory

I found another great idea for your young ones to say "Be Mine" without having to be like everyone else and buy pre-made cartoon cards that no kid really cares about.  Let's be honest here, all they want is the candy.  This idea will give them more of what they want, and less of the boring stuff.  Here's what you need.  Candy hearts, dental floss, ribbon and a needle.  Easy enough, right?


 I'm not going to lie, this is a sticky process, but with the dental floss, it does help make it smoother.  I used about 12 pieces of candy and put a few pieces of ribbon around and tied it together to make a delicious and very stylish valentine bracelet. 


See, with a little creative thinking, you will become the talk of the class. Happy LOVE day!

V-Day Table runner

I don't typically decorate the inside of my house for smaller holidays such as St. Patricks Day or Valentines Day. But this year I decided to try and make more of an effort.  So, I started with simple projects and baby steps to bring a little "LOVE" into my home for the month of February.  I thought I would start with a table runner made of hearts I had cut out while sitting in front of the TV one night. After an hour or so, I had cut out quite a few of these little hearts and was ready to begin hooking them together.  Just using a simple "tack 'em together" type stitch, I hooked them all together in various directions to make this cute and festive table runner to adorne my kitchen for Valentines.  So even watching mindless reality TV, you too can become crafty and put together your own little piece of holiday fashion.  Hmmm......now that's pretty crafty.


An aviation valentine

Sometimes I find myself feeling like a kid again.  Perhaps things back then were a little slower and we had time to create and invent things rather than just buying whatever is pre-made in a box at the local grocery store.  On Valentines Day we see so many different pre-packaged goodies and cards that it almost loses the meaning of showing each other that we care.  So this year, I decided to revisit my early childhood and this time I brought my 5 year old daughter along to help make valentines for her school class.


 We decided to create these fun homeade valentines that resemble an airplane.  You know you liked them then, and you would love to get one now.  I forgot how simple they were to make, and for me, the thought is much greater.


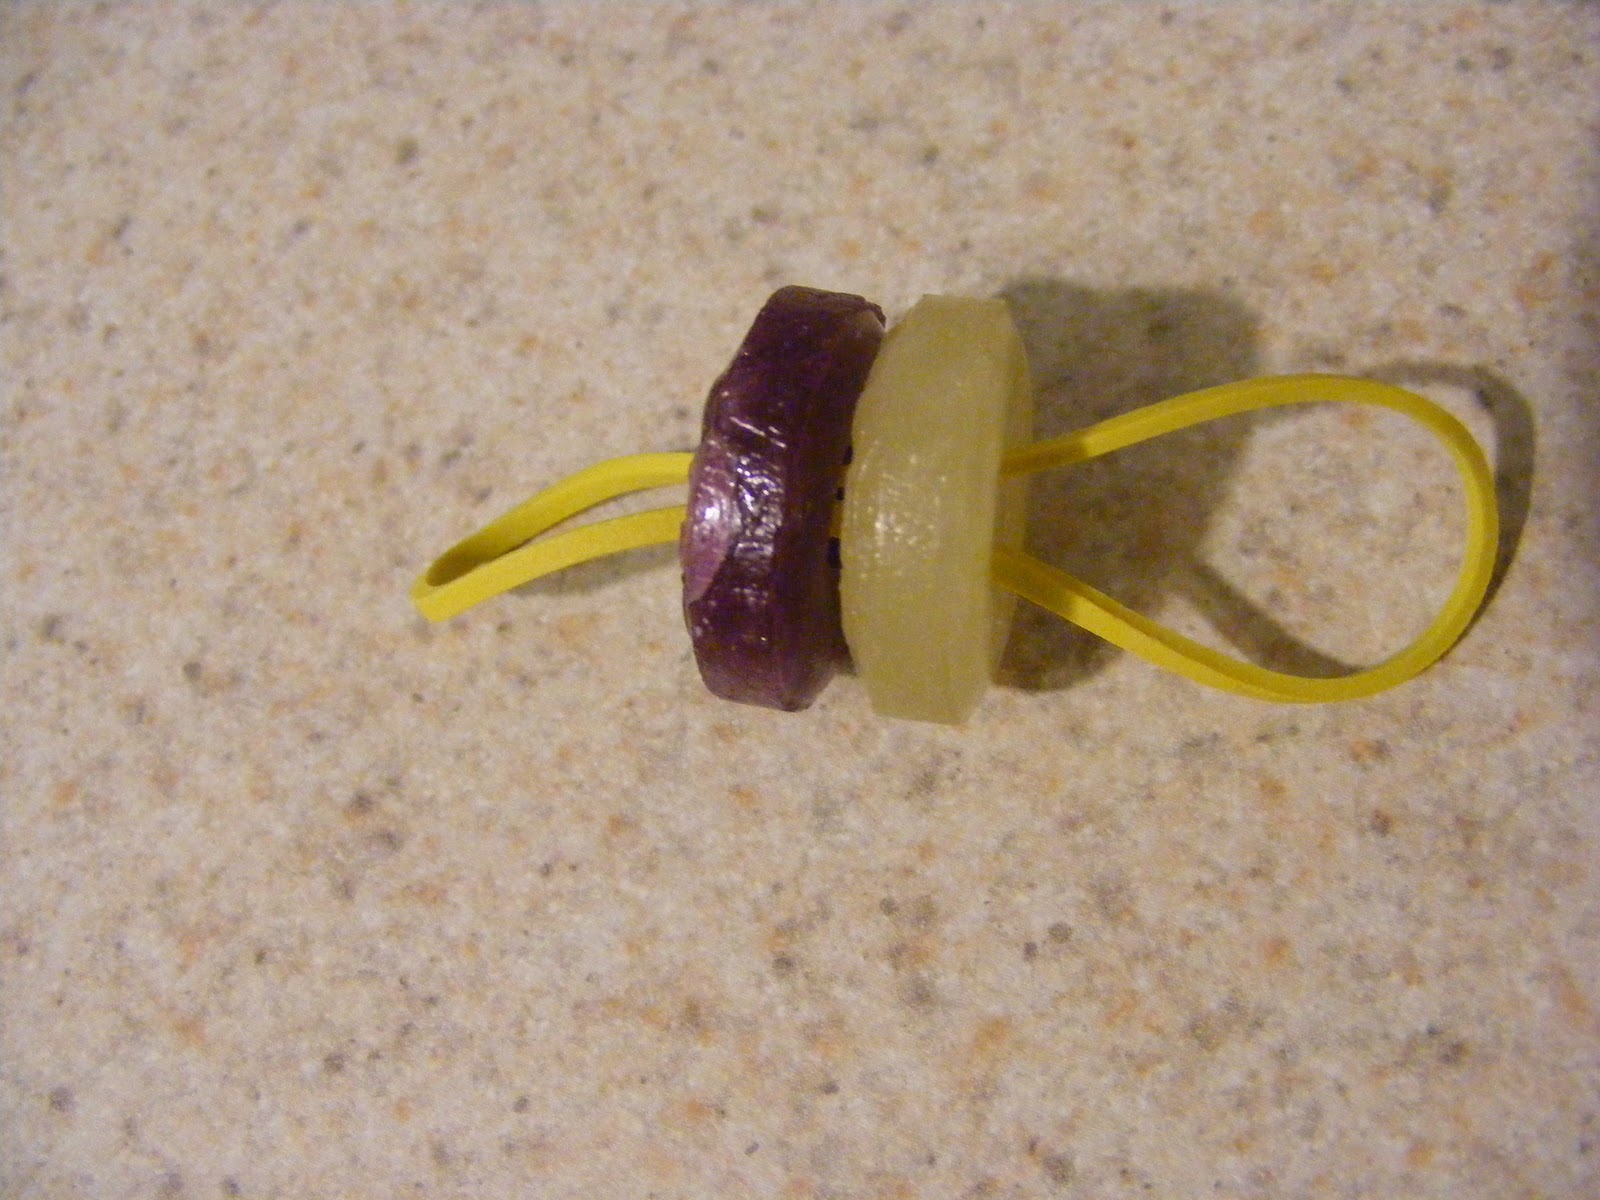
Here's what you'll need.  A box of large smarties, some sticks of gum, lifesavers for the wheels, and elastic to hook it all together.


Pull the elastic through two lifesavers.....


Put a stick of gum on top of the smarties..........ah ha....it's coming back to you now isn't it


And use the elastic to hook it altogether.  And there you have it.  A creative and fun valentine, even though it may be considered "old school"

Fabric Wreath

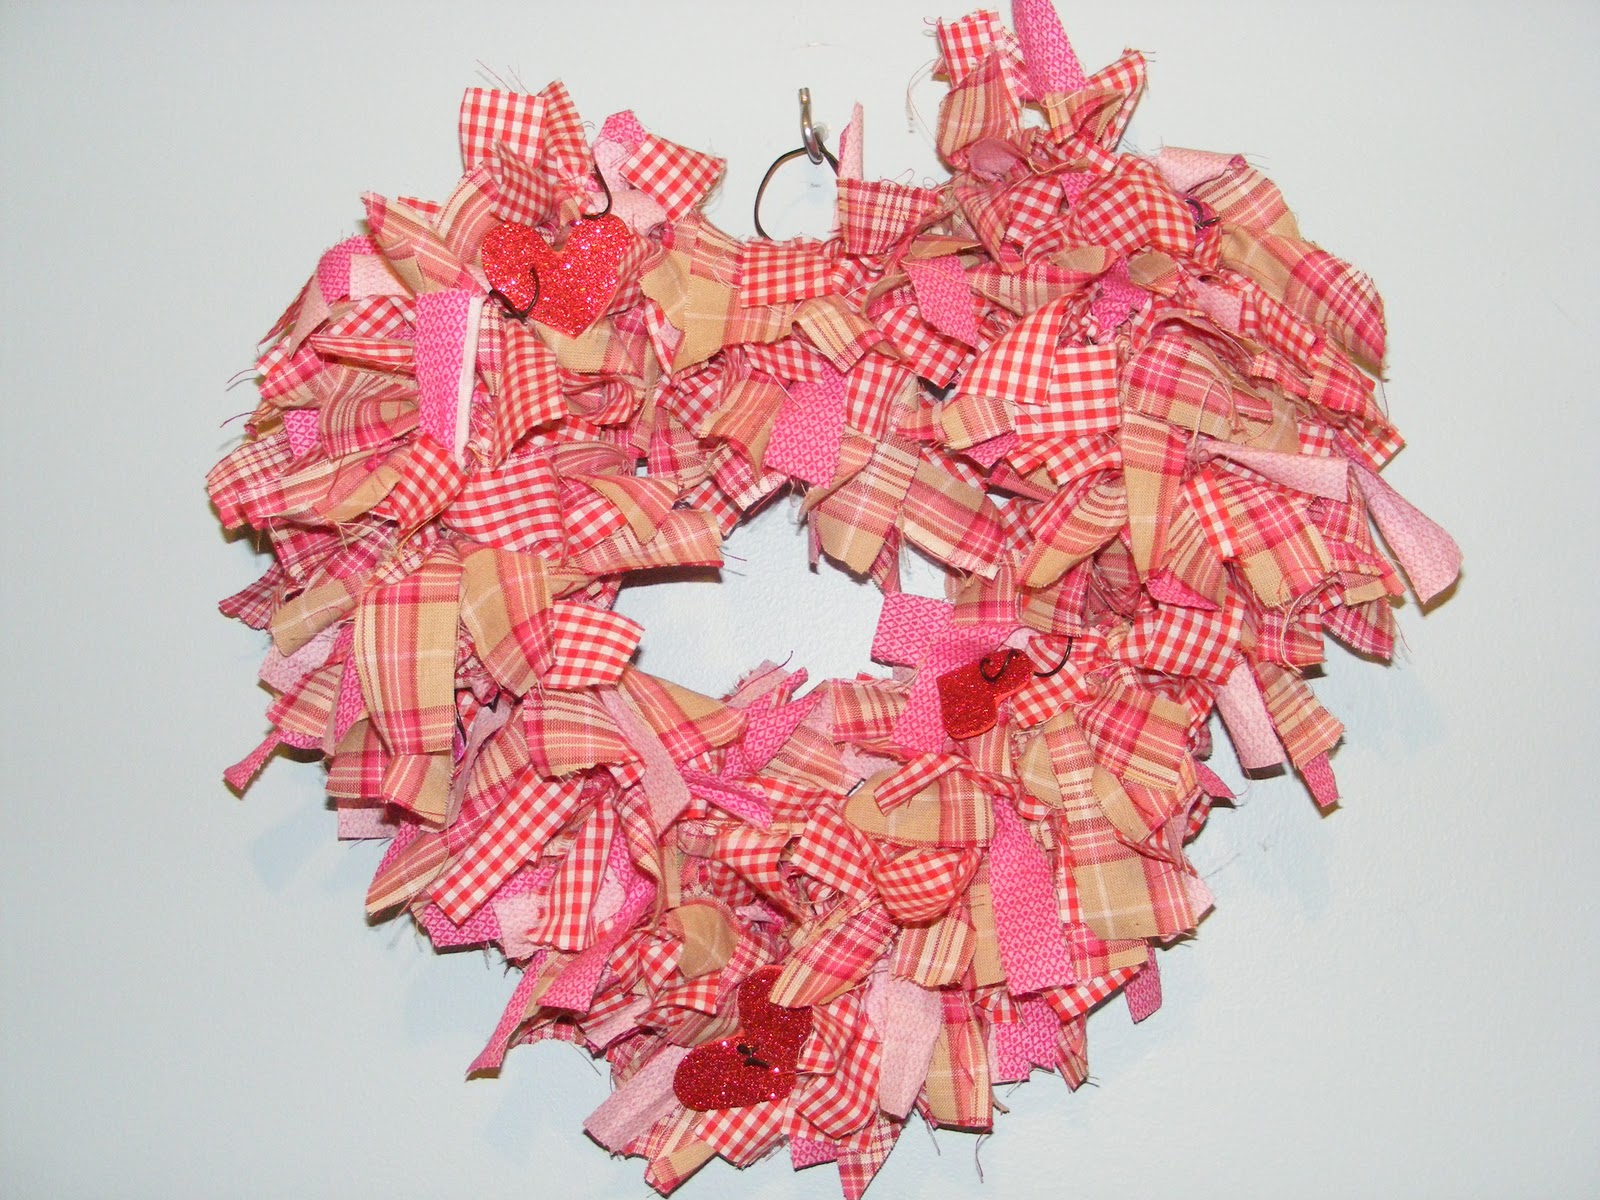
 I saw this darling fabric wreath at a store not too long ago, and as I am always on the search to find something cute to hang on my door, I studied it and realized "I could make one and save money doing it." (Remember that I am the cheap girl).


I decided if I can make this on a budget, how could I possibly keep it a secret.  You will die when you find out how easy it is. 

I went shopping through a bunch of left-over fabrics from various other projects that I had done and found two that would work well together.  For the third, I ventured to the fabric store and bought 1/2 a yard and it cost me $1.29.  What a steal. 


So now all I had to do was cut the fabric into strips.  If there is one talent I lack in life, it is the ability to make a straight cut.  Even if I have a straight edge cutter, it still doesn't work.  So I was beside myself with excitement when I learned that these didn't need to be cut exact, or even straight.  Ahhh.....it's a beautiful thing.


 So while watching Miss America on TV one evening, I got started on my project.  Cutting strips and molding wire.


Once the strips are cut, then the creating can begin. You can buy a wire form for this project at your local craft store, but I chose to save some money and just use some stiff wire to make my own.  


So I cut the wire and molded it into two hearts and hooked them together. 


Then I began tying on strips of fabric


 And you just keep tying, and tying on both hearts, pushing the ties together as close as they can get.


And when you have done that, then voila! Your wreath is complete.  I did add a little embellishment and curled some wire and added a heart cut from that glittery foam (looks like paper but it's foam) and sporadically added them to my wreath.  Now you are all set for Valentines day and you can brag when people asked where you got that darling wreath.