Showing posts with label front door decor. Show all posts

A bird on the door

I couldn't resist buying this flamingo to make to hang on my front door for the summer months.  I am always trying to come up with something different to hang and I think this one is it for sure.  Not many people are quite as bold to hang a pink bird on their front door.  But, I'm a little crazy, so this is right up my alley. 


I found myself at a cute wood craft store the other day and when I saw this I knew I had to have it.  It came unfinished and instead of just painting it, I decided to use some cute scrapbook paper to add a little flare to it. 


Here it is after the modge podge and sanding are finished.


And here it is all finished. I can't wait to display this crazy decor.  


Spring has sprung

Another wood carved project.  I guess once I get started cutting, I just can't stop.  Plus I have all of these left over scraps of wood and I just can't bare to let them go to waste.

How cute did this carrot turn out.  I mean really, how many people do you know that have a carrot hanging on their front door to ring in spring?  I am supposing not many would be so bold.  But, I'm not one to be afraid of showing off my love for color and love for all things odd.


So here it is all cut out and ready to paint.  Notice the little slices in some of the curves of the carrot? Those actually started out as mistakes, but in my world of creativity, no mistake is made that cannot be made into something crafty. 


I am loving this crazy color of green these days.  It gives a little variety to the color so not everything is grass green, although there is nothing wrong with that color in particular.


Add a sparkle and a bit of ribbon to it and VOILA!!


An extra large carrot to hang on your door.,  Who wouldn't want one of those.

Oh PS.....if you're not into cutting wood like I am, I found a pattern very similar to this last week when I was at the wood connection in Salt Lake.  But who wants it pre cut when it's so fun to play with the saw?

What color do you bleed?

At my house, we bleed RED. 
 UTAH UTE RED that is! 
So to show our school spirit (even though we have been out of school for some time now)
I have made these fun door hangers to remind people who we cheer for. 


What color do you Bleed?

If you are interested in showing off your school spirit, especially with football season starting, 
I am selling these for those die hard fans. Just email me at isntshecrafty@gmail.com to place your order


Here are samples of some of the logos I have made.....


University of Utah $25


BYU Cougars $25

A 4th of July Wreath

Check our this super cute wreath I just finished for my friend.  She wanted something supe simple yet festive.  It is a simple wreath form purchased at Dollar Tree and wrapped in red and natural colored raffia ribbon.  I did use a bit of glue here and there just to keep things in place.  Add a few blue flower things and VOILA!!


Pretty simple.  This project took me maybe 35 minutes and I was able to do it while being distracted by the Miss USA pageant.  If I can multi-task like that, so can you.

An Initial impression

Regardless of whether or not you enjoy gardening and have beautiful gardens surrounding your house, you should a least provide a welcoming entry to your home.  Just as the inside of your home is an expression of you and your personality, so too should your front porch as it is the first impression your guests will get from you.

It doesn't have to be extravagant, something simple, put together with a little thought and freshened often (even if it's just with a can of spray paint).  My front porch consists of items found at thrift stores, classified ads and a little creativity born in my office in the basement.


This fantastic twig chair I found for $25 on a classified ad, the lantern could have been purchased at  Costco for $50, but I found it at a thrift store for $10 because it had a broken piece of glass. (I just turned the broken side to the back so you would never know.) And one of my very favorite things to do is change out the sayings on my door for each holiday-or month- which I do with my silhouette vinyl cutter.  I often get comments on them and people are intrigued at what will be posted next.


I love my grapevine swag that added a bit more character to the porch.  Especially at night when the white lights come on.  There you go....porches are not just for door mats and mailboxes anymore.  Time to think out of the box and express yourself on the outside of your house too.

An early start on Easter

I am not one who typically decorates and gets all festive for Easter.  But this year, I decided to step it up and quit celebrating the "big" holidays only.  Poor Easter is so often overlooked.....well, here is your time to shine.  I decided I could at least put a cute wreath or something on the door.  I began looking for one, a cute one with all the glitz and sparkle but they were like $40.  Cheap girl here says no way to that, and so I headed right over to the Dollar Store to see if my crafty mind could come up with something else.  What do ya know, my trip to Dollar Tree paid off.  For an investment of $8.00, a few glue sticks and a little bit of time, I was able to make my version of the $40 egg wreath decor and quite honestly, I think mine is cuter. (Probably because it's cheaper)


Happy Birthday

We love to go all out to celebrate birthday's at at our house.  In addition to party's and special dinners, we love to decorate for the day.  With balloons filled and scattered all over the house, and banners taped across the garage, I felt like we needed something on the door. So here is what I came up with.


I have decided this is the best project to work on while watching a movie or in my case, the Bachelor.


At the dollar store, I picked up several spools of curly ribbon and went to town cutting string and curling them.  I then picked up a Styrofoam ring and got out the handy glue gun (in case you haven't caught on, it is one of my favorite inventions ever.)


I first began by putting glue strips in random spots around the foam wreath and with the help of a toothpick, pushed the ribbon through the glue and into the Styrofoam for extra protection.


Just keep up with the process mixing the colors as you go.


After about one hour, this is the result.  You can make it as full as you want.  After all, it is your creation. 
This is sure to scream  "HAPPY BIRTHDAY" and cheer up someones day.


Now isn't that crafty?!?!


Here it is on my door. (Sorry about the tree)


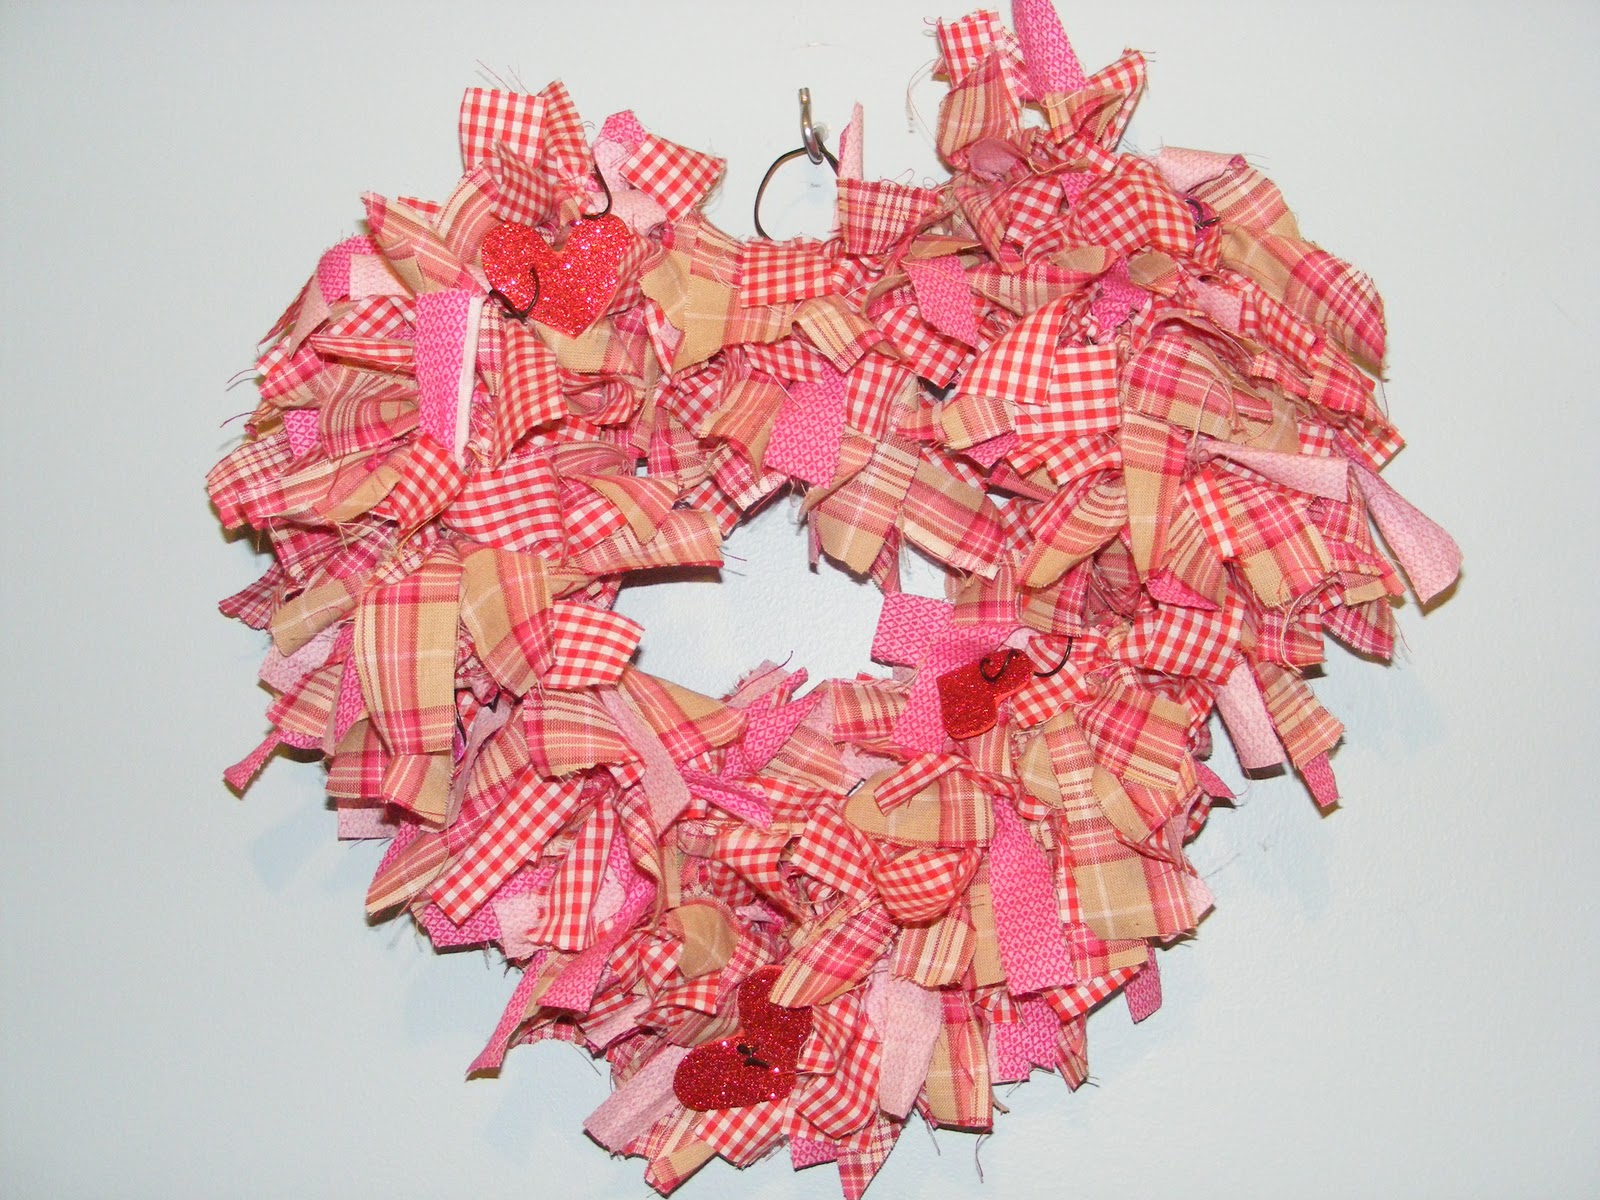
Fabric Wreath

 I saw this darling fabric wreath at a store not too long ago, and as I am always on the search to find something cute to hang on my door, I studied it and realized "I could make one and save money doing it." (Remember that I am the cheap girl).


I decided if I can make this on a budget, how could I possibly keep it a secret.  You will die when you find out how easy it is. 

I went shopping through a bunch of left-over fabrics from various other projects that I had done and found two that would work well together.  For the third, I ventured to the fabric store and bought 1/2 a yard and it cost me $1.29.  What a steal. 


So now all I had to do was cut the fabric into strips.  If there is one talent I lack in life, it is the ability to make a straight cut.  Even if I have a straight edge cutter, it still doesn't work.  So I was beside myself with excitement when I learned that these didn't need to be cut exact, or even straight.  Ahhh.....it's a beautiful thing.


 So while watching Miss America on TV one evening, I got started on my project.  Cutting strips and molding wire.


Once the strips are cut, then the creating can begin. You can buy a wire form for this project at your local craft store, but I chose to save some money and just use some stiff wire to make my own.  


So I cut the wire and molded it into two hearts and hooked them together. 


Then I began tying on strips of fabric


 And you just keep tying, and tying on both hearts, pushing the ties together as close as they can get.


And when you have done that, then voila! Your wreath is complete.  I did add a little embellishment and curled some wire and added a heart cut from that glittery foam (looks like paper but it's foam) and sporadically added them to my wreath.  Now you are all set for Valentines day and you can brag when people asked where you got that darling wreath.