Showing posts with label room makeover. Show all posts

Another room remodeled

So this remodel project is what has taken me away from blogging and other various activites for the last little while.  I decided I had to change the paint color of my basement family room to a color that was a little more me.  For years I have seen my friend's cute house and it was painted this beautiful yellow color that I was absolutely in love with.  I got the name of the color and instantly bought 5 gallons to paint our newly finished basement familiy room.  I got it on my walls, and new right away that I didn't love it.  I tried to decorate differently, add accent walls,  you name it I did it.  But I could not get over how much I hated the color on MY walls.  I got to dislike it so much, that I didn't even enjoy going down there anymore unless we were going to watch a movie and the lights were off so I didn't have to look at it. I hve learned through this ordeal, that things you like in other's houses, will not always look good in your house.  I still love her house color, but it is just not me and it is certainly not the color for my house.
 
 
So, after the holidays, I decided to change the color to something I liked more.  My upstairs main rooms were painted a beautiful Camino Gray (Ralph Lauren color) and I loved how calm they made me feel and how neutral they were to decorate with.  So, I took that color downstairs as well.  And then combined it with what I like to think is my signature color, Fire Engine Red!!  I want to share a few tips with you about buying gray paint.  There are a million different grays out there and I have learned (the hard way) that you have to be careful how you choose the perfect gray. 
 
Gray paint has three different base tints. You can get it with a base color of purple, blue and green.  The purple and blue may look pretty together, but once you get them on the wall and the walls start reflecting off each other, you will see that they will look lavendar.  But, gray with a green base tends to give you a true gray color. Just FYI.
 
 
I decided to make a focal wall as a faux board and batten square pattern. I did that in my little boy's room and you can find that tutorial here.

 
I then found some great fabric at a local home fabirc store who sells fabric at wholesale prices.  It took 10yds to do make 4 - 84" panels.  I paid $40 total for the fabric.  I feel like I practically stole it!! The window cornices were featured in a tutorial way back when and you can find that here if you like that look.

 
And then those super cute frames, I made them.  I have no tutorial on them as it took me forever to get from start to finsih becasue lately I have a serious problem with starting 5 or 6 projects and finishing 0 of them.  Because of that, I have no insructions for how I made them, but I did find instructions here, so you can make your own.

 
And I did another faux board and batten square pattern at the end of the hallway.  One day I will get around to hanging some really cool and colorful pictures but again....I have become the crafter who doesn't know how to finish a job. So that will have to be for another day.
 
All in all.....I think the room turned out amazing!!! And it was a remodel that with a little time and effort, cost very little to do.
 
 
It's all about being a litte daring.....and a little crafty.


A bathroom makeover

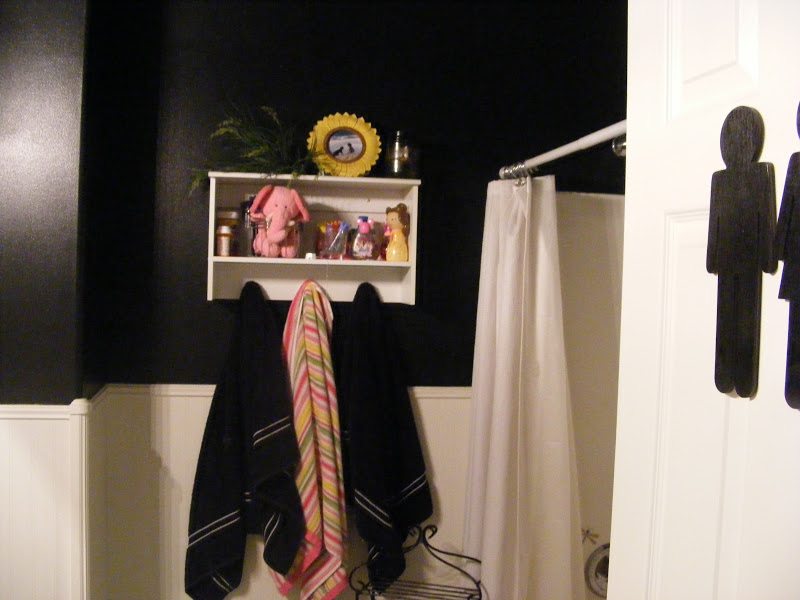
My new bathroom.....is pretty crazy.  But I have to admit that I am TOTALLY  in love with how it turned out.  I am not one who likes to do things simply.  When I do something, I want it to be bold and crazy.  I have always heard that your house decor should represent your personality.  That a person should be able to tell what kind of a person you are by the way your house is decorated.  For me, I have to agree.  This to me screams loud, crazy, daring and original- me to a T.
 
 
I started out with my cute black bathroom which I have had this way for years and have loved it.  I have loved the black......and the fact that no one else I knew had a black bathroom made me love it even more.


But as time goes by, the need for change rears it's head......and then the fun begins.

 
I knew I wanted to stick with my main color being black, and I new I wanted something super abstract.....so instantly I thought of a harlequin design.  I looked for wallpaper and couldn't find anything that met the expectations I had envisioned.  So, I had to do it myself. 
 
I went to the Home Depot and purchased a 6" by 6" tile to use as a template for my design. With the use of a level, I was able to sketch out a few diamond shapes

 
and then to make work a bit easier and quicker, used a ruler to continue drawing the lines.

 
After about 3 hours, I was able to sketch out the entire bathroom.  Now begins the longest part of the process.......the taping.

 
I decided to tape up and paint just one wall to make sure that it was what I wanted it to look like before I kept on with the grueling task at hand.  I painted it, took the tape off and found I didn't love it. My lines weren't super straight, and there was paint bleed from my not-so-good tape job. So, I took it upon myself to go to plan B.  Now don't judge me for this.  Just think of it as my creative, cheap mind trying to make it work.
 

I was at Hobby Lobby purchasing my Christmas wrapping paper for the season, and then I saw it and an idea was born.  The exact harlequin pattern I was looking for that I wanted on the wall.  Now I realize wrapping paper and wallpaper are totally different things, but I thought "why not".  And for $7 for a roll of wrapping paper I loved, vs. $82 for a roll of wallpaper I just kind of liked, there was no question in my mind.   Now this particular wrapping paper was a bit heavier duty than most.  So I bought myself 3 rolls and headed to the aisle where I could find super strength spray adhesive, made my purchases and headed home.  


I sprayed the wall with the adhesive and followed the instructions carefully on the can.  I then cut my wrapping paper and hung it on the wall, until the whole room was covered.  I tried super careful to match up the pattern so it would look as seamless as possible.  To finish it all off, instead of using modge-podge which I used on a similar project before in my master bathroom, I used a polyurethane and lightly painted it over the paper to make it a bit more waterproof.  I don't know if I would recommend this in an area where the walls would be getting wet a lot, but because the majority of my room is covered in a bead board, I felt the paper would be a safe choice. 
 
So that's it.  And with the help of one of the best home consignment stores ever, Consign & Design furniture and home decor in Farmington, Utah, I found a darling mirror and cute rod iron stand that added the fun little touches to this room that I was looking for.

 
As crazy as this may look and sound to most of you out there, I feel like I got what I wanted, spent a total of $65 on the entire project and made it work for me.  It just took a little thinking outside of the box, and a little bit of an adventurous spirit.  

 
But isn't that what being crafty is all about.


A fancy bar stool

I am trying to spice up my house with a little extra color.  I find myself sometimes getting bored of the two toned color and like to express the bold side that sometimes I keep hidden.  Since I am on a bit of a budget, I have to work with what I've got.  So, I turned to the kitchen and saw my boring old bar stools sitting there needing some serious attention. 

I painted them black for starters and then here's where I went crazy...


At Michael's Crafts in the scrapbook paper section, they have these papers that are quite fantastic and look like lace.  I had to have one.  Didn't know what I was going to do with them, but I felt drawn to them. Then I thought back to the bar stools.


I decided to put them on top of the bar stools to add that much needed color and instantly fell in love.  


Now there are three things in life I have found that I cannot live without.  
1. Spray Paint
2. A hot glue gun
3. An air compressor with a nail gun/stapler.

Well, one more thing has now been added to the list of "can't live withouts"

MODGE PODGE
People, if you have not discovered the splendor of this product, then I suggest you get acquainted.  


I cut my paper lace to fit the top of the stool, Modge Podged it on (which puts a coating on it so it becomes no longer like paper, but now wipeable)


And VOILA! Here they are finished.  Just that little bit of color I was craving.  


I think it's all PRETTY CRAFTY!


A new bold color

I have been so fortunate in my home to have a room where I can craft to my heart's content.  I don't have to put things away, I can leave multiple projects out until they are done....but most important, it is a CHILD FREE ZONE!!  I know, it's my own slice of heaven.  I have had this desk in there though that is literrally falling apart.  It was supposed to have a nice glass top to it, which was broken in a move and so here sits this pitiful desk with holes in it where the dowels were supposed to be to support the glass.  It makes it real hard to do large landscape drawings when my pencil keeps finding these darn holes.  Something had to be done.


I found an old kitchen table someone was getting rid of and a light bulb went off in my head.  Best $10 I spent. I took it home and sanded it within an inch of it's life trying to get all of the nicks and marks off of it.  During the process I found out a pretty cool trick.  If you have a piece of furniture that is pine, and it has been dented ('cause pine is kind of soft) put water on the dent and it will swell and the dent will fix itself.  Now don't ask me how it all works....just go with me here and know that it works.


I never used to prime anything before I painted it, but I have learned that if it is a piece of furniture that has ever had any kind of glaze on it, or is going to be used alot, primer is necessary.  It gives the paint something to hang on to.


So after a good layer of primer, I had an out of my mind moment and decided on this CRAZY color of hot pink.  Who doesn't love a bit of color, right?   Well, I thought, "if I hate it, I can always repaint it."  Turns out, I KINDA LIKE IT!!


And although it is super bright and crazy, it makes me smile and want to sit down at it and get right on crafting. 


I guess the point I am trying to share with all of this is.......don't be afraid to be bold.   It's just paint. If you hate it, START OVER!!

Happy Crafting!

Little boy's room

I've been at it again.  Remodeling another room.  This one needed to be done.  Anyone who has little boys can identify with that.  For me, the fall is the perfect time to start indoor projects........let's be honest here, it doesn't matter what time of year it is, I have always got a project.  But, none-the-less, fall is a good time to drag out the old paint cans, sandpaper, and my favorite.....the nail gun! Put all of those together with a little diet pepsi, some good music and a little creativity, and this is the result.


A room any toddler can enjoy and quite honestly, can keep for a long, long time.

This is the before.  Not too bad. Just needed some love and a bit of touch up. However, because I forgot the name of the paint colors I used, I had to start all over and couldn't do just a quick fix.


If you haven't noticed in a home decor magazine or on tv home shows, 2011 is the year of the stripe.  Stripes are everywhere in fashion and now on the walls.  I have loved the look of them for some time now, and finally decided I had the perfect place to try them out.  My boy's room.  So, that's what I did.  3 of the 4 Walls are striped, the other wall, a paneled wainscot. 


To do the stripes, I got some frog tape (first time I have ever used that brand and I LOVE IT!!) and measured out the wall.  I knew I didn't want a whole bunch of small stripes, rather 5 big ones.  So, I had to do a bit of math, divided the wall into 5 equal -or close to- parts and taped them off with the help of my trusty level. I then painted my dark color aka. forest khaki and then let it dry for 24 hrs.  


When it was dry, I took the tape off and had to basically repeat the process (minus the math) to accommodate another color.  So, I spent the day taping again, and then painted the white color aka. natural echo.  

Then, there was the fourth wall.  I painted it out all white ready to begin the real work.
It took quite a bit more math and a lot of eyeballing, but I think we got it right.   I sketched it out on the wall to make sure before I started nailing boards into place.  My aunt is an artist and I have learned a great secret from her....instead of using a pencil to draw out your lines, use chalk.  Pencil doesn't come off so easy, and chalk comes off with little effort.


Once the boards went up, I caulked and spackled the holes left from the nail gun as well as the edges where all the boards met.  I wanted it to look as seamless as possible.


Once the sanding is done, the final coats of paint go on.  And the result.....


A room anyone can enjoy. 

Mudroom COMPLETE

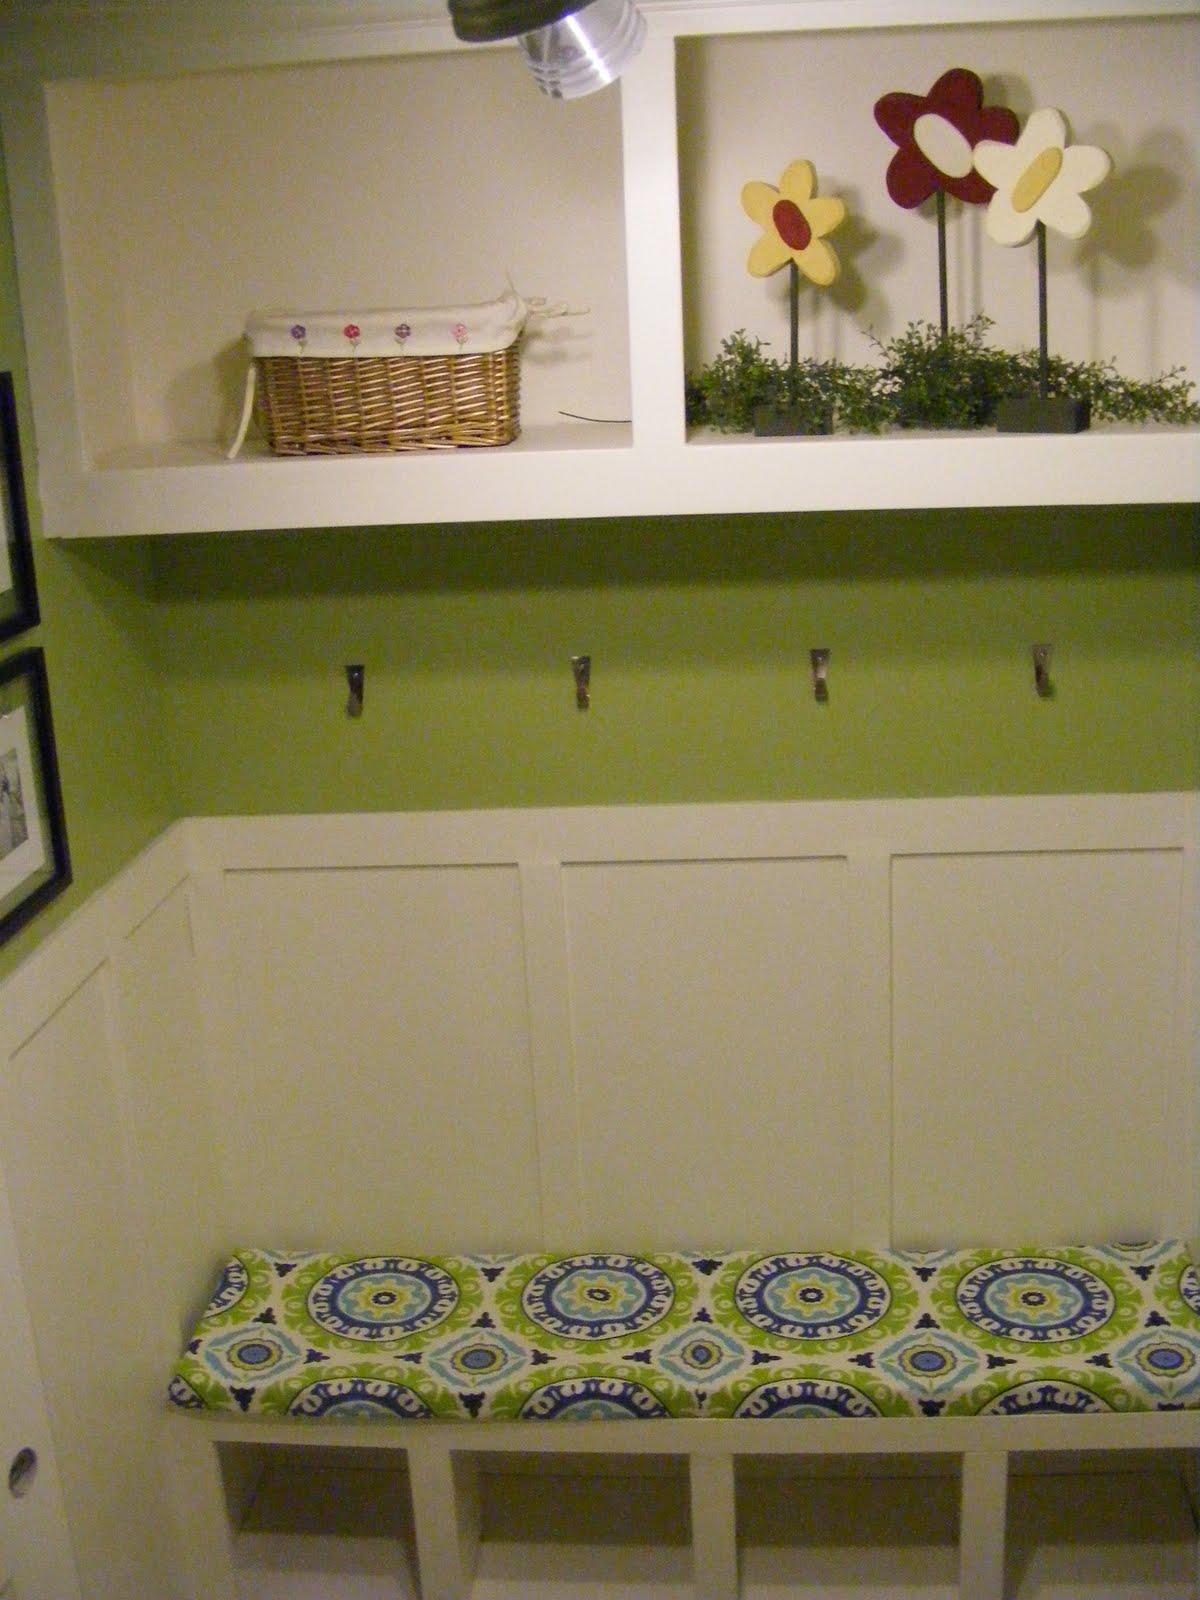
I am so excited to tell you all that my remodel project from pantry to mudroom is FINALLY complete.  No more dust, no more paint, no more junk laying all over the place.  It turned out super cute.  Here it is.

Here's the before


And it is now!


I think of all the remodels and projects we have done in our home, this one was the best idea.  

You've got to check this out!


I recently found out about this amazing site called Olioboard that pretty much changes my world of decorating and furniture placement.  You too will die when you check it out.

Anyway, Olioboard is a site where you can very easily create mood boards for rooms. Turns out, there’s nothing to it. It really couldn’t be any easier. Once you create your (free) account, and choose to create a new board, you’re taken to a blank screen with this nifty little menu on the side:


And from each one of those categories, you can drag and drop your selections onto your mood board. You also have the option to manipulate the pictures (resize, rotate, etc.) They have products from West Elm, Crate & Barrel, Layla Grayce, Urban Outfitters, and more. And if I understand correctly, there’s also a way to add more products if you don’t see what you want…but I wasn’t quite that adventurous last night. I just stuck with the thousands of products that they already had available.


 In short, it’s loads of fun, and highly addictive! 

Here's a board that I created for a bathroom I would like. 


I am actually in the process of trying to make the light pendant.  It is coming
along slowly, but turning out pretty incredible.

I’m telling you, this site is FUN, and I could easily lose several hours of my day if I’m not careful. It’s a great way to visualize how your room will look before ever spending a penny, which can help you avoid those impulse buys and purchases that you’ll later regret.

A laundry room redo - making progress

We have been busy working away on this laundry room makeover.  You may remember that we have this really awkward pantry in our laundry room that we have decided to convert into a mudroom type bench area.   After doing some cleaning and organizing in our kitchen and storage room, we decided we can easily live without a pantry.  So, we got to work ripping  it all down.

Here's the best "before" picture I could get.


The door that opens into the laundry room from the garage opens so that you walk right in to the washer and dryer.  Since the idea is to now have a mudroom bench, we wanted to change the direction that the door opens so you walked in to the bench area instead.  And, since I try to do as much as I can spending as little as I can, we just turned the door around instead of buying a new one.

Here's the before


Here's the after.
I can't believe the difference it made in the flow of the room, and somehow added more room. 


When tearing down the wall, we found that the studs ( the wood) was totally exposed and needed a bit of sheetrock to cover it so the wall would be flat and smooth.  So, off to Home Depot for a bit of sheetrock.

Before


Sheetrock is now in place and the wall will now be smooth and even.  Now all we need to do is tape and mud. 


I built a bench and added some cubbies for shoes and stuff.  My girl has already begun to put hers to use.


We have a few things that still need to be fixed before we begin mudding and taping and painting.  For instance, when the wall was torn down, we noticed the floor had been laid around the wall, so we have to patch it.  Luckily we found some vinyl at the store that matches this perfectly that we can use until we decide to tile. ( I don't hate this floor enough yet to want to rip it out and replace it)


And in one spot, I got a little too excited when knocking the wall down and accidentally punched a hole in the sheetrock.  So a bit of patchwork needs to be done. OOPS!


But for now, it has to stay like this.  We are off to the Lake for a little R&R for a few days.  And then.......it's back to the remodel.  Stay tuned for the finishing touches.  I can't wait to see if it all turns out.